
What story is this piece telling?
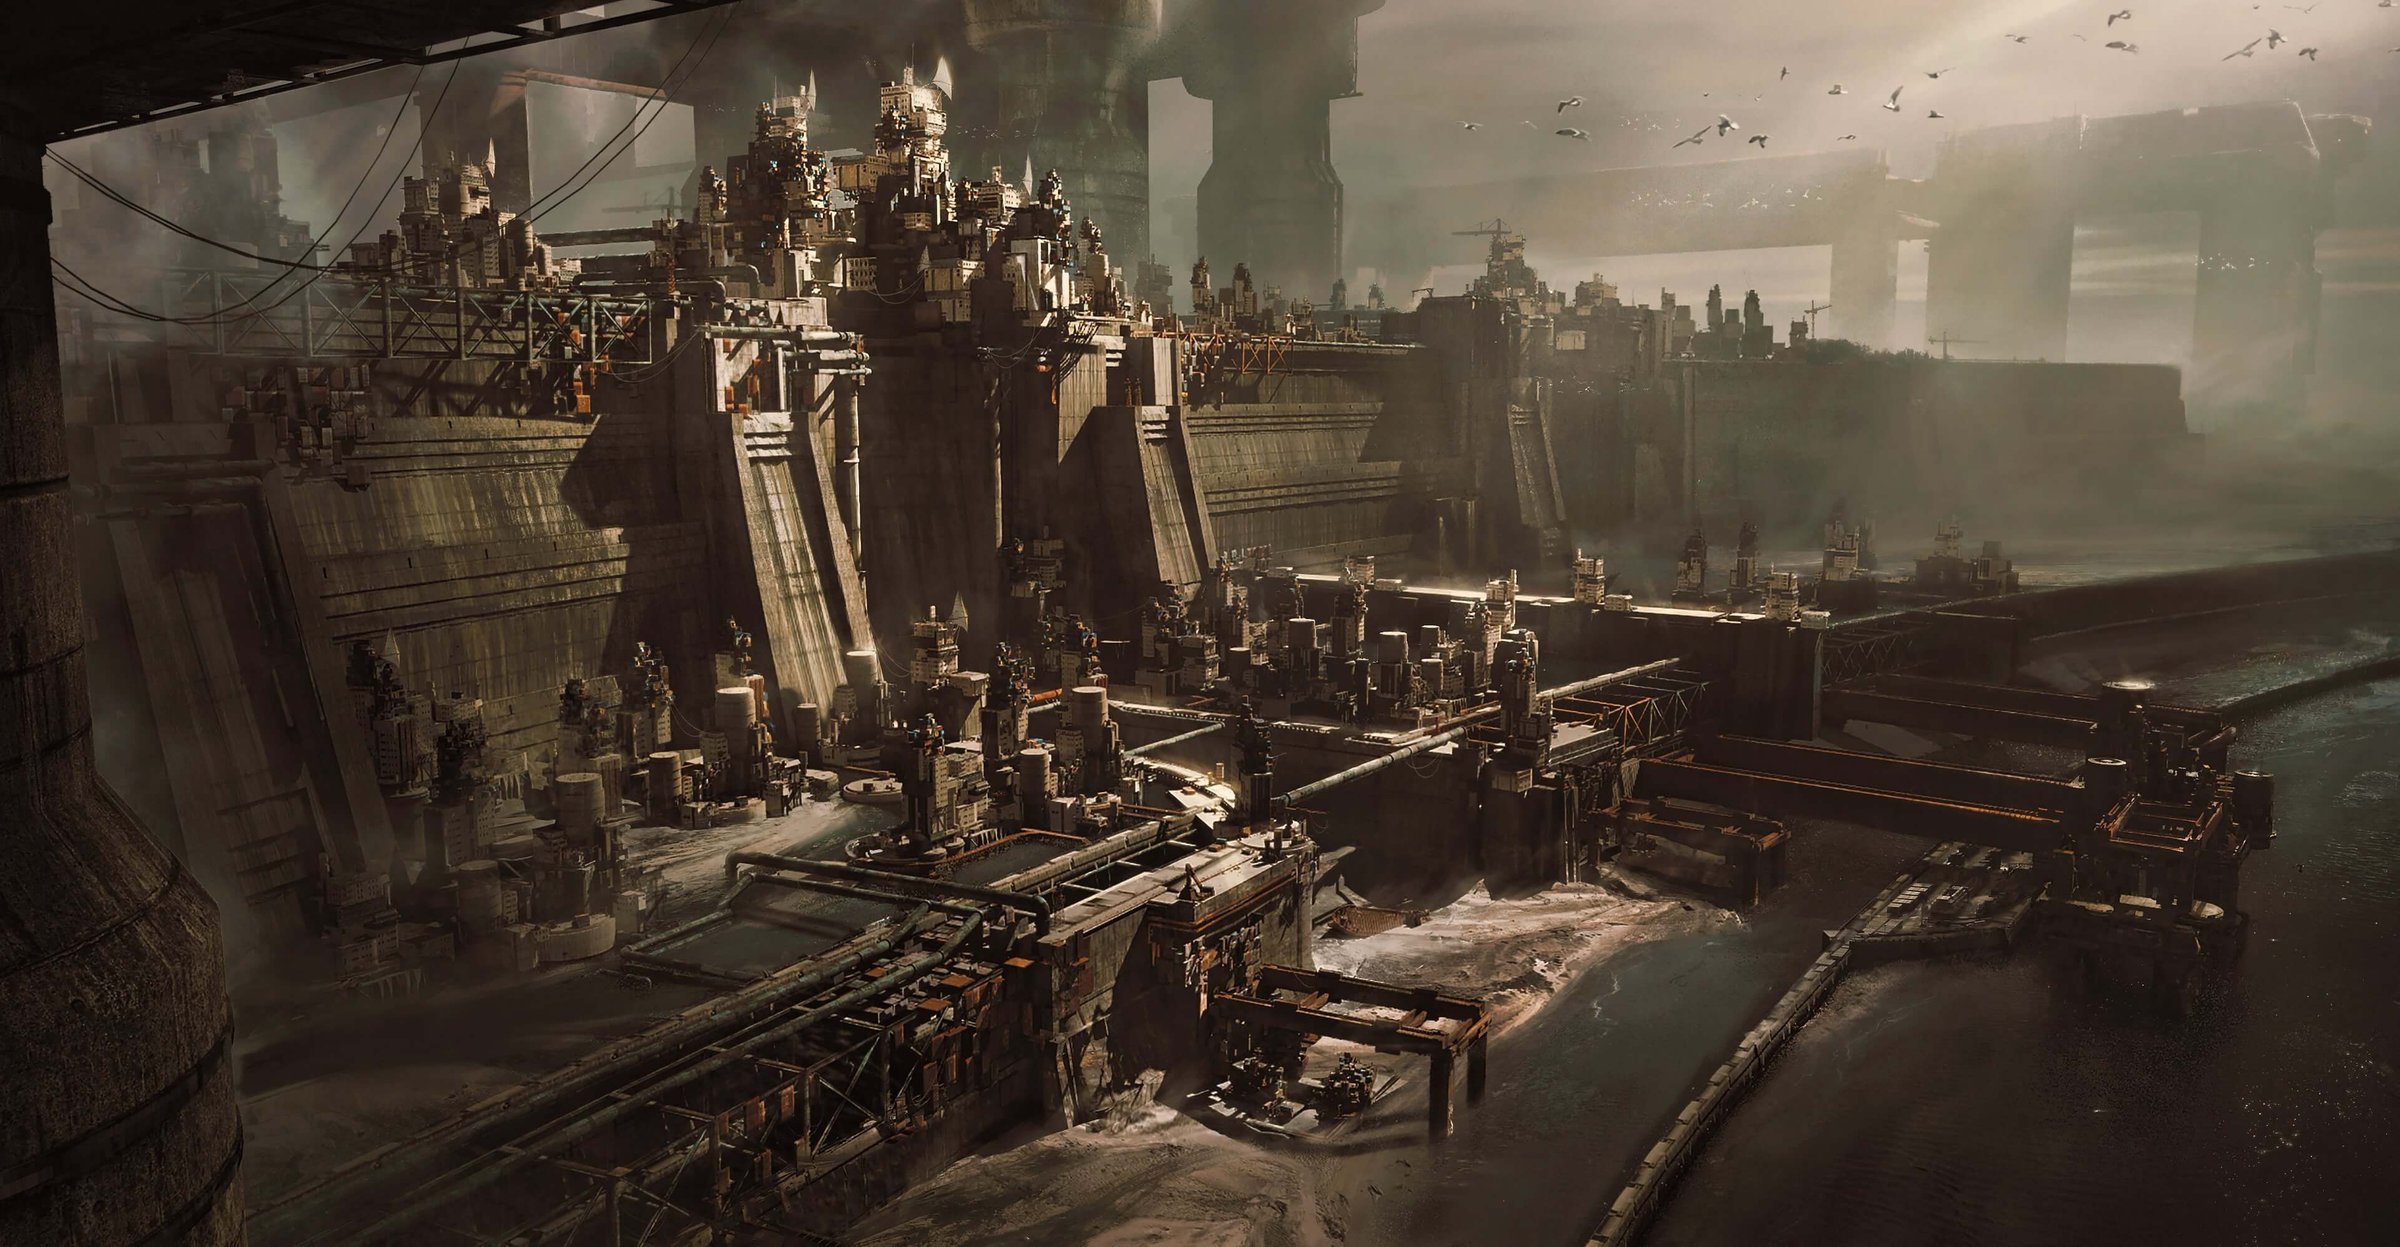
When I started working on this piece, I knew I wanted to depict a scene that felt massive and desolate. The Wasteland Kit features so many cool pieces with great storytelling already imbedded, some of which implies flooded cities. Many of the pieces have details similar to what you might find on an oil rig or a dam, which immediately stood out to me as something I could riff off of. Since the theme of the kit was wasteland, I also began to think about the apocalypse and how climate change would have dramatic effects on the globe. I began to think of a dismal future, set a century after a catastrophic global flooding. In attempts to preserve some coastlines, countries would have unsuccessfully attempted to build massive dams and levees to hold back the water. I wanted to create an image that would show the remnants of a dying humanity clinging to life in settlements built along canals and the dam walls. I wanted to make an image that felt both dismal, but also grand. I wanted to contrast the typical apocalyptic setting of dried-up desert wastelands with one that was more of a waterlogged rotting earth.
How did you create this piece?
For this piece, I jumped right into blocking out some test scenes to begin getting familiar with the set. Focusing on the major shapes, I blocked out a quick scene to get something together, confident in the themes I wanted to portray. During this step, I did a few rough paint-overs in the place of the thumbnails I'd typically begin with using renders that I felt had composition with some potential. I tried to see if I could find something to grab onto for the overall direction of final image.

Some notes I made for myself after these paint-overs were that I wanted to make an image that was even larger in scale, similar to what you might see from a bird’s eye view in an establishing shot. I wanted to show these rusted dam settlements, but I also wanted to hint at what the rest of the world might look like outside of this thinly populated refuge. I also wanted to allow for more of the receded flood water to be present in the image to evoke the feeling of a waterlogged, rotting landscape. The final note I made for myself was that I need to make a more interesting POI to take the place of my focal point.

After making notes for myself and moving back to my 3D scene, I had a much clearer direction for my final image. I began blocking in larger shapes to function as my shell. I wanted to build out these structures of dams and canals to have a foundation of what the settlements would be built on top of since these would have been built at two different times. I was able to make the larger walls from pieces in the kit and begin blocking out how to light my scene.

Adding in the smaller structures like buildings and props immediately added a more accurate sense of scale and I began blocking out individual areas. I wanted the way structures are placed to feel believable, so I moved around the scene fleshing out areas to make the space feel "lived in." Walkways and catwalks are where you would expect them to be, detail is placed around areas of interest, and the layout has logic applied to it. I found this step to be very fun, but also a bit of a time-suck. In a production setting, I probably would have kept this stage somewhat basic and painted in the rest of the detail, however, I also knew I wanted to be able to create multiple images from this one scene so I intentionally spent more time working out the meter-to-meter detail.

Once my scene is fully built out, addressing materials and lighting started to increase the drama of the image. I wanted the lighting to feel as though the atmosphere was volatile and somewhat oppressive, as though it was baring weight on top of the environment. I created cloud cast shadows with transparency assigned planes above the scene and adjusted the levee areas in the background in shadow and allowed for the focal point to be hit with direct light.

At this stage, I rendered out the various passes and moved onto the paint-over. It was important for me to eliminate the qualities that made the scene feel slightly too hard-edged and crisp, and wanted to emphasize lighting and atmosphere.


Incredible work, Ken! Thanks for taking us through that. So how did you become a professional concept artist?
Ever since I was a kid I've been drawing. I think watching Star Wars at a really young age had a dramatic effect on me, much like it did on a lot of artists in the game and film industries. I distinctly remember the moment it dawned on me that people made art for video games. I was given The Art of Half-Life 2 and I was instantly fascinated by the creative process of making games. The book differed from most art books that are published today, because it gave insight into all the creative disciplines that came together to make that specific game special. I was particularly drawn to the concept art done by Victor Antanov and Ted Backman. The locations they created particularly stood out to me, which really got me thinking about pursuing concept art as a career path.
After attending college for game art, I found myself struggling to get a job doing concept art. Over the next few years I worked in retail while creating my portfolio in my free time frequenting art forums like conceptart.org and deviantart.com trying to get as much feedback as possible. The few years after graduating I had been left with a feeling of missing out on a proper art education. I had taken a watered-down version of all the intro art classes you'd expect from a three-year private college.
I decided to attend graduate school and pursue an MFA with a focus on digital art. I had an incredible experience in graduate school immersing myself deep into many of the areas I felt I had missed in my undergraduate experience. I left feeling much more confident in my knowledge and experience. This is when I began applying for industry jobs. A little while after, I got my first industry job as an associate concept artist. That was almost five years ago.
We've seen your process above, but what is your typical process before starting a project? What are your research methods? Or do you jump straight into sketching? Do you sketch at all?
Over time my process has somewhat distilled down to be similar regardless of the project. There is always an element that is unique to that specific task, but my thought process tends to be the same. I always start with very quick thumbnail sketches to get familiar with the shapes and begin to explore ideas untethered to any reference. I find that on personal projects where I am my own art director, avoiding reference when doing this first round of sketches helps me establish some sort of direction even if it is still not fully figured out. Then, I'll typically move on to reference gathering. I begin by coming up with a list of descriptive words that I would like the image to evoke either literally on paper or in my head. I want for the earliest reference images collected to depict ideas and emotions that can be associated with my intended subject matter. I’ve always felt that by starting here you begin very broad and general, but still with enough of a purpose to steer clear of the very first image search result that Google drags up if you were to just type in: epic wasteland dam.
These days a large portion of my process for creating a finished concept piece is in 3D, where I block out to varying levels of detail the space I'm designing. I try to keep it somewhat open to interpretation and low poly while still attempting to get in the major landmarks of my idea, focusing mostly on large compositional shapes. This is perfect for when I am doing very quick design studies on top. This also serves as a last-minute sanity check before committing to a design to bring to polish. I can get out a few quick ideas on how to make the composition work as best as I can and give myself mental notes for storytelling.
After I land on either one of a combination of these sketches, I move on to the polish phase. I will typically go back to my 3D blockout and focus on getting in the necessary details to bring the ideas from my sketches to life. This stage is my favorite because this is where these abstract ideas and rough sketches are finally becoming tangible and believable. I get to focus on the more tactile aspects of the image like lighting and material quality. After getting the 3D scene to the point where it successfully communicates the overall idea, I will render out my various passes (i.e., depth, material clown, and ambient occlusion). With my renders completed, I move on to final paint-over, where I'll introduce photo textures to add more tactile qualities and scale cues. I'll also go in and soften edges, making sure my values are correct.
What keeps you motivated? Why do you create art?
Going back to Star Wars-- the thing about those movies that I was always so drawn to was how "lived in" they felt. The locations truly felt as though they had existed for ages before us viewers got a glimpse into that world and will continue to exist long after; as if the viewer is only seeing a small slice of a fully-functioning world with its own societies, religions, and history. The same feeling I had as a kid watching Star Wars is the same feeling I get from creating an image. Making art has always been an escape for me. It’s always been about being able to create worlds out of thin air away from the mundane reality of the world.

Ken Fairclough is currently a concept artist at BioWare and his work includes Anthem, Mass Effect Andromeda, Alita: Battle Angel, Shadow of the Colossus (2018), Lawbreakers, and Star Citizen. You can check out more of Ken's stunning work here.