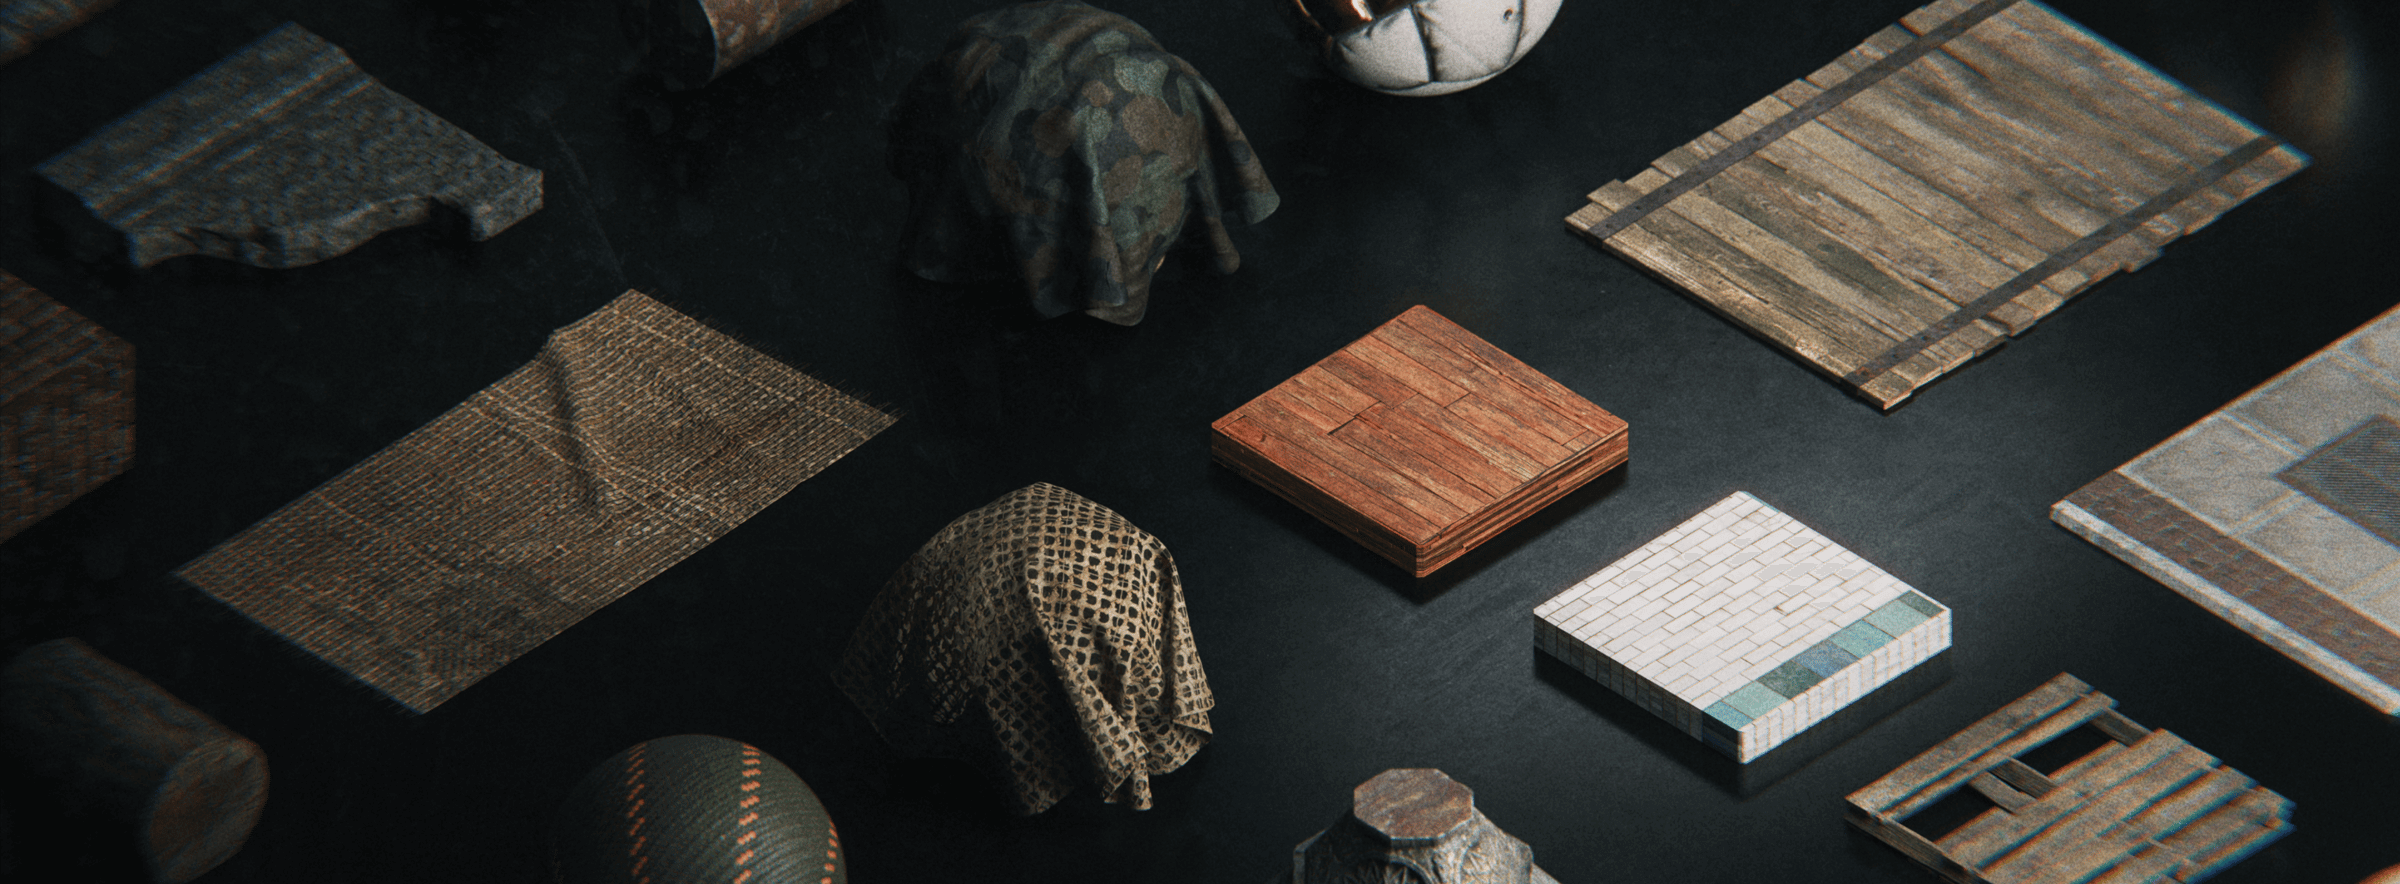
For years, 3D artists have relied on KitBash3D for high-quality models to build worlds faster. Now, we’re adding another powerful tool to your pipeline: a fully stocked library of Substance Material Kits designed to make your worlds more customizable, realistic, and efficient to produce.
We spoke with Alexey Druzhkov, our Lead Technical Material Artist, about the new materials to learn what’s inside the library, why it matters for 3D generalists, and how it solves everyday workflow headaches.
What inspired KitBash3D to create Substance Material Kits?
We saw a gap in the market for high-quality, handcrafted, genre-driven materials that seamlessly integrate into professional workflows. Too often, 3D artists are stuck hunting for the right texture across inconsistent marketplaces, dealing with .sbsar files that have limited controls, or worse, no editable .sbs file at all. Building materials from scratch eats up valuable time, and matching asset styles across a whole scene can quickly turn into a repetitive headache.
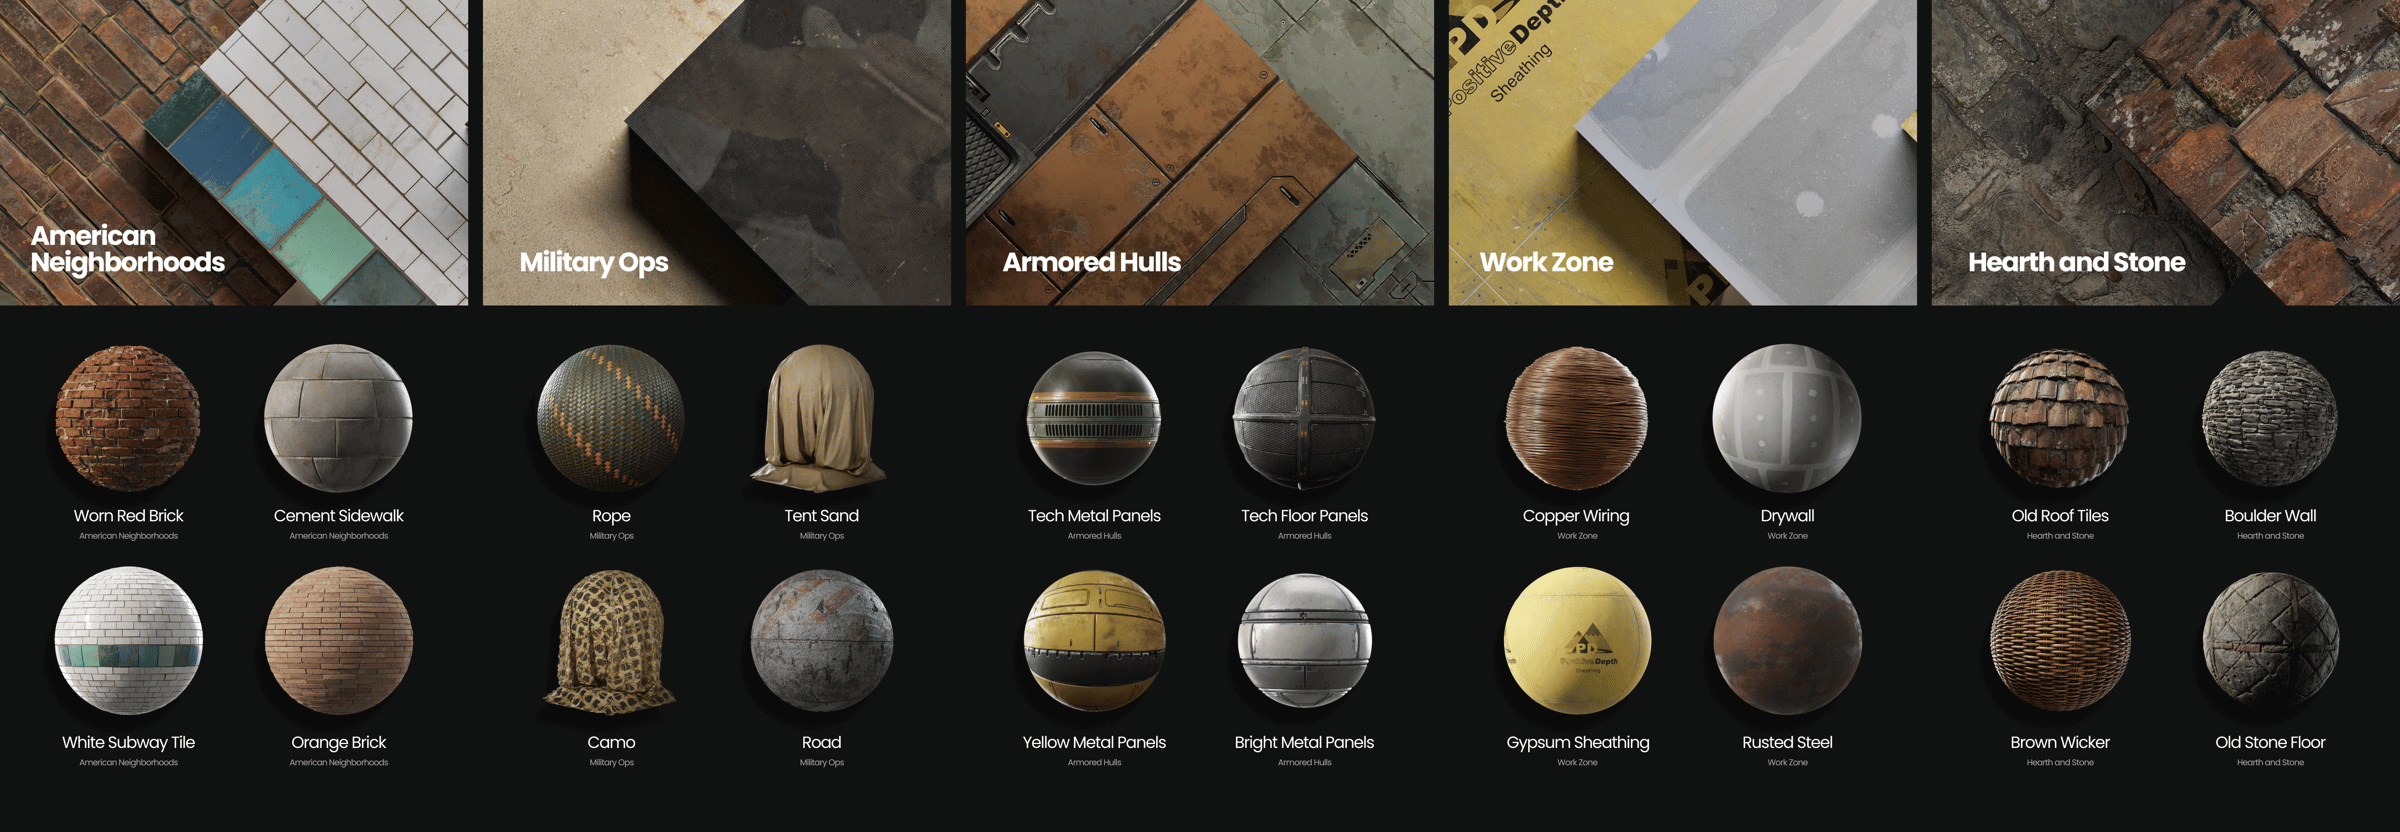
Our goal with the Substance Material Kits is to remove those obstacles. Each Material Kit is selected to support the most common creative needs in real-world and cinematic environments, ensuring artists can hit the ground running, no matter the project. This foundation sets the stage for more specialized materials in the future while showcasing the quality, range, and storytelling power of these procedural materials.
What’s your typical workflow when creating a procedural material in Substance Designer?
My workflow always starts with gathering high-quality references. I organize them into categories: color and mood (where atmosphere matters more than scale), mid- and small-scale references to study form, and large-scale references to analyze microdetails.
I also research how the material is made in real life, whether it’s a wooden door where the grain direction is structurally essential, or a broken concrete wall where the mix composition affects texture. Once I understand the material, I move into Substance Designer, beginning with the large forms on the heightmap. This establishes the surface architecture, which becomes the foundation for building complexity and detail throughout the material.
What principles do you follow to keep your .sbs graphs clean, efficient, and reusable?
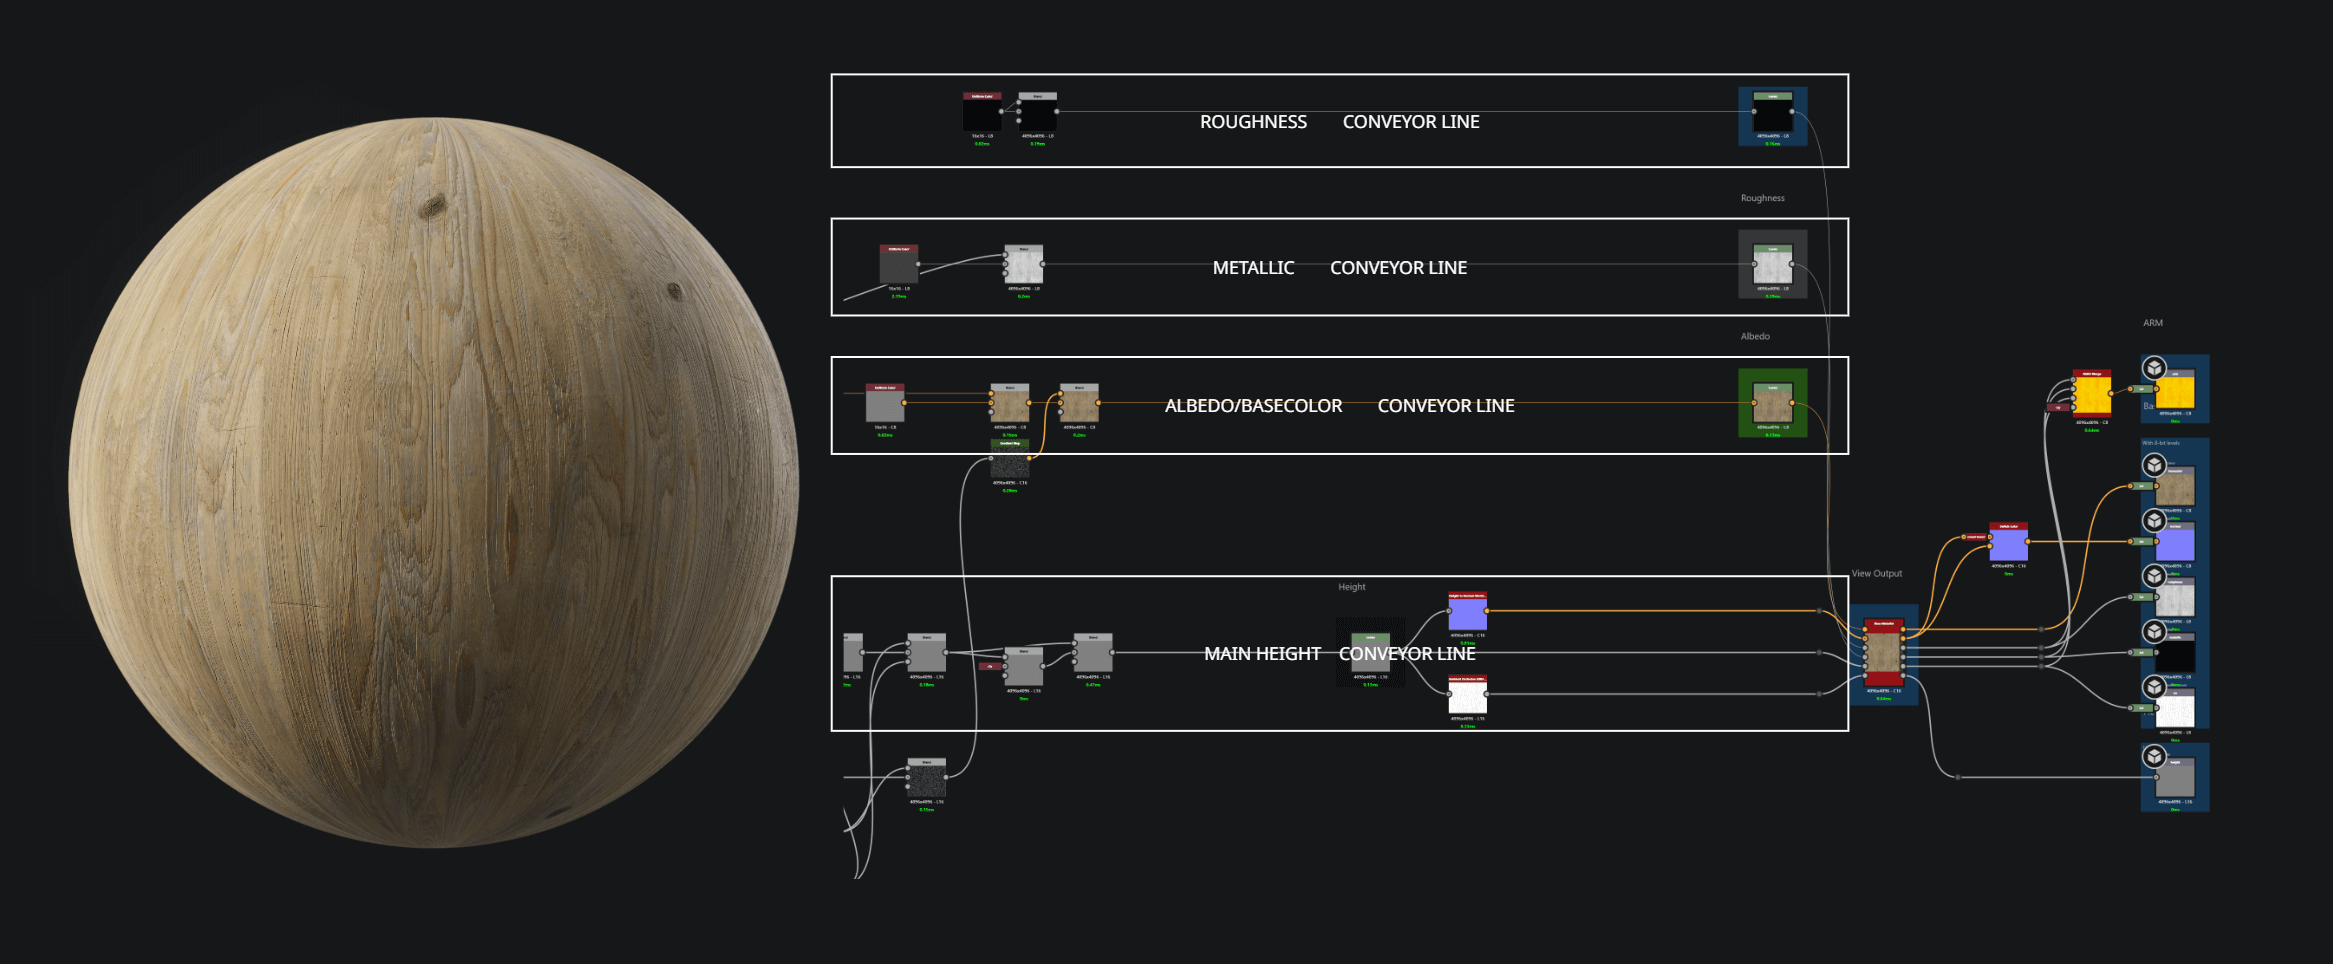
Maintaining a clean left-to-right graph structure is one of my core principles. My background in UX and UI design gives me a strong foundation in visual communication, which I apply in Substance Designer using concepts like eye-tracking patterns, left-to-right bias, and the Gutenberg Diagram.
I build my graphs with parallel "pipelines" for each channel—BaseColor, Roughness, Metallic, Heightmap, and so on. This structure keeps the logic clear across layers and makes the graph easy for other artists to read. The Heightmap pipeline is always my starting point, as it contains most of the forms and masks that are reused throughout the rest of the graph.
Frames, graph instancing, and grouping patterns or noises are essential for organization, and I rely on portals, a cool feature within Substance Designer, to hide unnecessary visual clutter while preserving underlying logic.
How do you decide which details to emphasize?
Focusing solely on details doesn’t work if the material doesn’t read as a whole. I follow classical design principles described by Johannes Itten: contrast as the main expressive tool, color theory and harmony, rhythm and distribution of form, and, above all, unity and visual hierarchy.
Hierarchy of focus is essential: large shapes → medium shapes → small details. We read the overall silhouette and rhythm first, then notice microvariations. Contrast and rhythm are key for readability, even from a distance. Some small elements may require extra attention due to complexity or realism, but putting too much energy into a single area rarely makes the material stronger.
Were there any materials in this release that posed a particularly tough challenge when creating them?
One of the most challenging materials to create was Organic Bone Wall, which features complex shapes like bones and skulls that aren’t practical to build entirely procedurally in Substance Designer.
This material includes baked atlases of bones and skulls that you can reuse in projects. While the skulls themselves are baked, their placement is handled procedurally. This approach keeps the material highly editable and flexible, and manipulating the skulls works just like redistributing any other pattern; they behave like any other element in the graph.
How do procedural materials compare to scanned textures in terms of flexibility and creative control?
Photogrammetry offers a fast and efficient way to bring real-world surfaces into a project, capturing authentic character with natural variation, unique markings, and lifelike imperfections. It’s an excellent choice when instant realism is the goal, providing artists with a direct snapshot of reality that can be further refined if needed.
Procedural materials, on the other hand, are designed as systems, built with logic, structure, and complete creative control. Every detail is intentional: where the wear collects, how deep the cracks form, how patterns evolve, and how they adapt to the style of a project or the needs of a specific scene. Because they aren’t bound to resolution or baked-in data, procedural materials remain endlessly adaptable. Variations can be generated on demand, empowering artists to respond quickly to last-minute changes or new creative directions.
More than just flexible, procedural materials provide a foundation for true creative authorship. They allow artists to move beyond borrowing from reality and instead build entire worlds with precision, adaptability, and imagination.
What do you think makes a procedural material truly stand out in a production environment?
In production, a material’s value isn’t measured only by how it looks, but by how it behaves. Is it predictable? Scalable? Can it adapt quickly to a new environment or respond to a last-minute direction change, whether that’s a texel density adjustment, a shift in scale, or a style tweak?
A strong procedural material is more than a texture; it’s a system. Built with clear logic and a readable structure, it can be modified not only by its original author but by anyone on the team. That shared control makes procedural materials inherently collaborative, adaptable, and reliable.
In our workflows, the same procedural material can be reused dozens of times with different masks, parameters, or across entirely different assets, without breaking, introducing artifacts, or needing to be rebuilt from scratch. This consistency makes them not just flexible but dependable building blocks for production.
And because procedural materials are systems, they also become tools within tools. Their logic can be expanded for new use cases, evolving into smart workflows that raise quality while reducing production time over multiple iterations. Many of these efficiencies are already embedded into KitBash3D materials, ensuring artists have both speed and creative freedom at their fingertips.
Are there any lesser-known Substance Designer techniques you used in these materials?
In addition to clean linear workflows that are easy to edit, we also use internal tools that speed up tasks like creating trims, advanced edge detection using blended methods, and distributing detail in controlled ways.
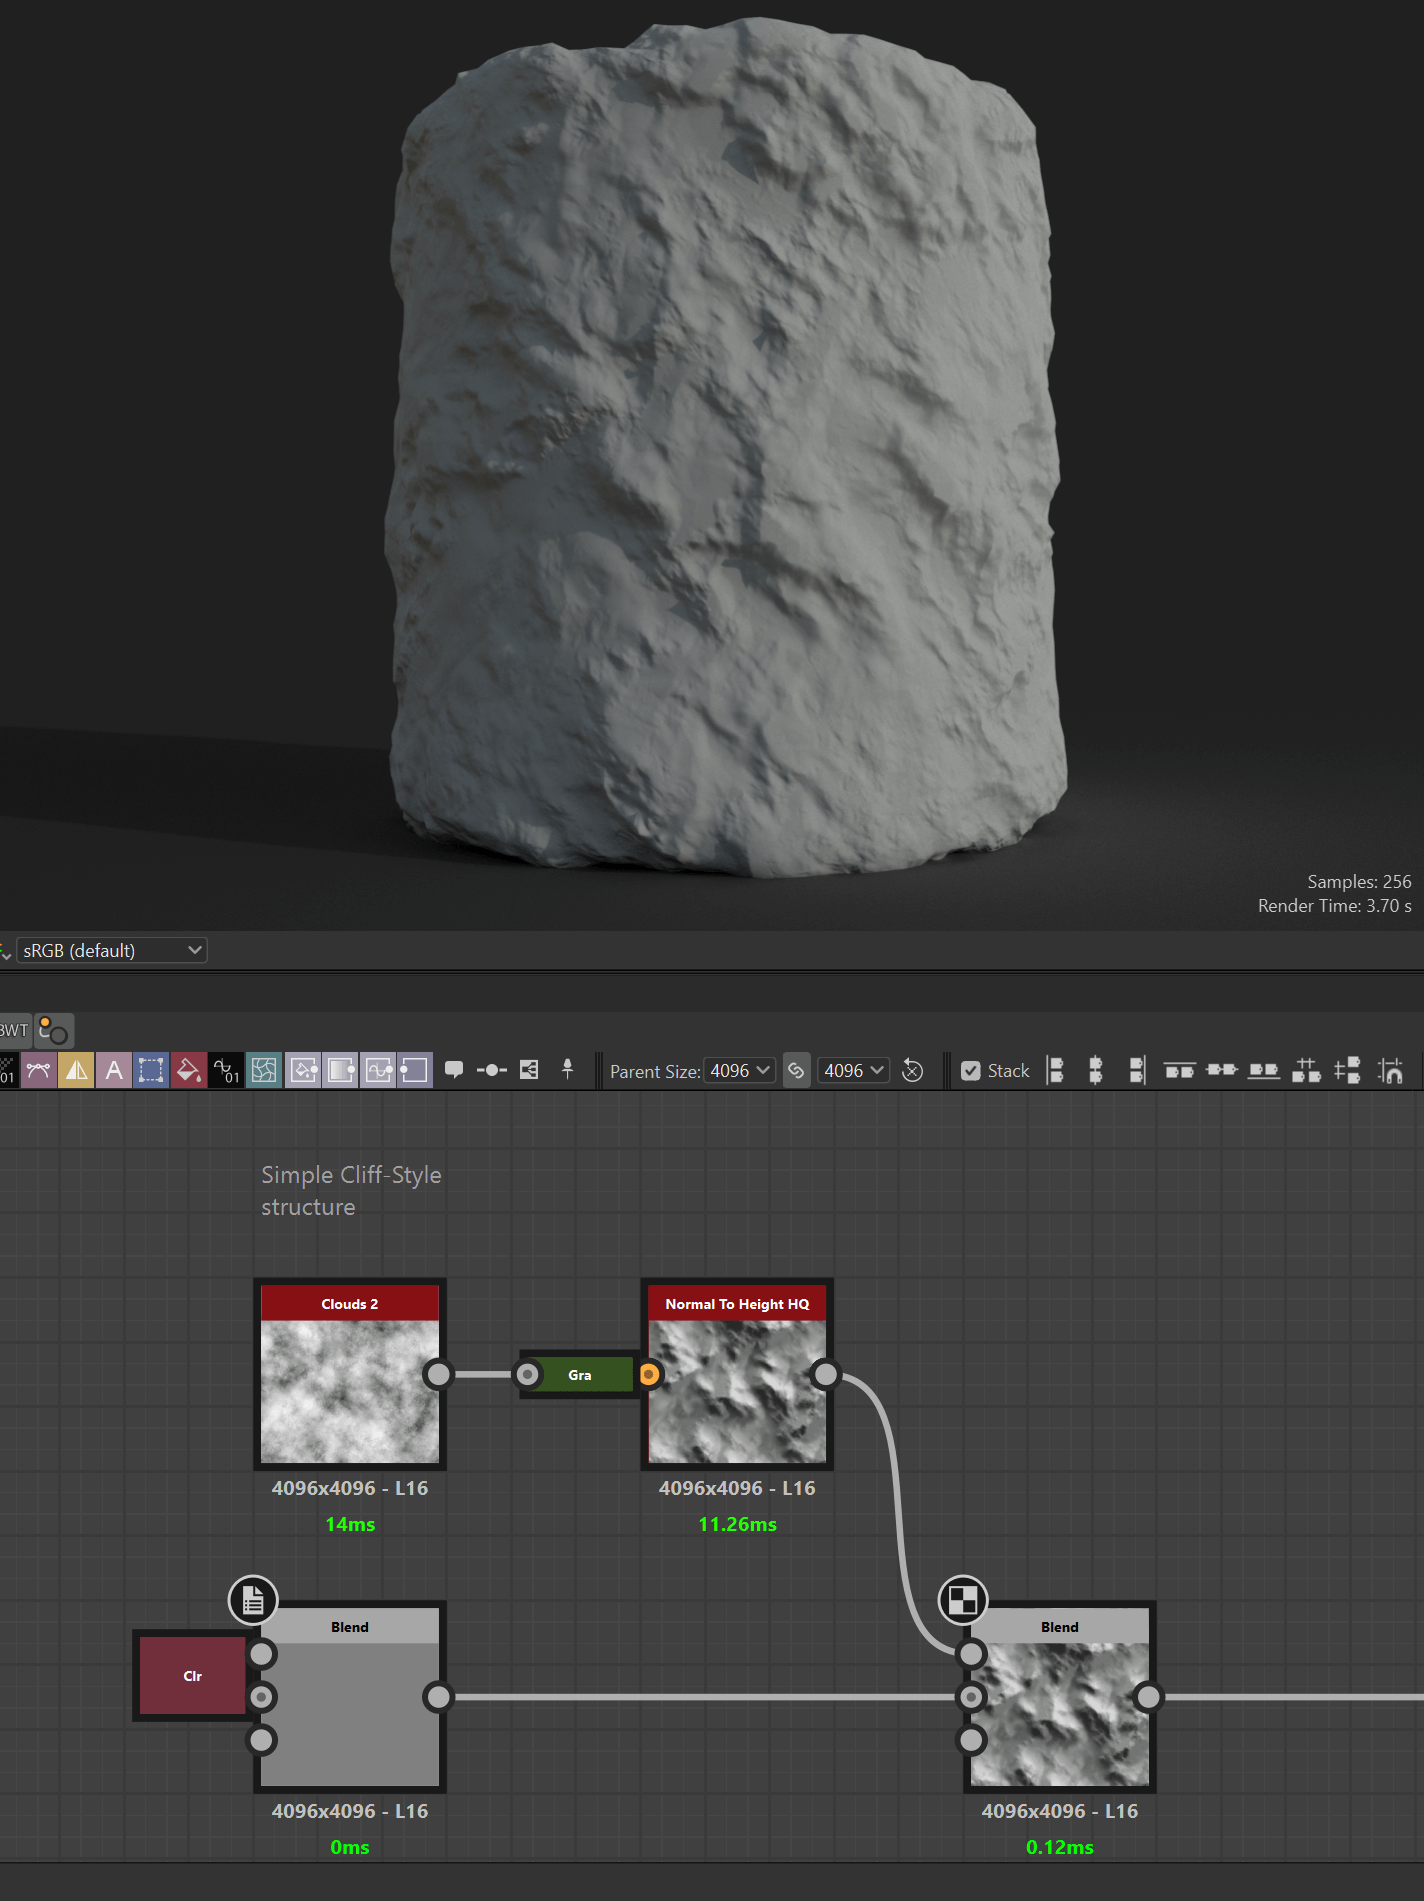
You’ll often find unusual uses of standard nodes - for example, applying Normal to Height HQ to grayscale noises or height maps, not normal maps. It’s these little tricks that unlock more complex behaviors without increasing node count.
What advice would you give to artists who are new to substance procedural materials?
Foundations & Mindset
• Start from order, not chaos. Build your materials with a clear, structured approach instead of diving into random experimentation. A clean workflow makes it easier to improve, share, and reuse your materials.
• Study the real surface that inspired you. Pay attention to how it’s built, how light interacts with it, and the subtle variations you see in the real world. Training your eye this way sharpens your ability to translate reality into believable digital surfaces.
• Stay curious and creative. Don’t get stuck chasing “perfect realism” or the “correct way.” Great materials balance realism with artistic interpretation, and curiosity often sparks breakthroughs.
Learning from References & Other Artists
• Gather useful references. Choose references that actually help your material development (color, form, micro-detail) rather than endlessly scrolling mood boards.
• Learn from other artists. Reverse engineer .sbs files, study how graphs are structured, and check out examples on platforms like ArtStation. Breaking down existing work is one of the fastest ways to level up.
• Use photoscans as study tools. Even if they aren’t as flexible as procedural, photoscans are goldmines for learning. A clean scan can help you analyze surface shapes in the normal map or pull realistic color palettes for your materials.
Production-Safe Best Practices
• Keep albedo values realistic. True black or pure white rarely exists in nature. Stick to RGB 30–240 to ensure your materials behave consistently in PBR workflows. This is especially important in games where lighting conditions vary.
• Example: Coal or rubber ≈ RGB 30, 30, 30
• Paper or snow ≈ RGB 240, 240, 240
• Don’t rely only on height and displacement. These define the big surface shapes, but normal maps carry much of the perceived volume. A little artistic exaggeration in bevels can make your materials read better, even from a distance.
Understanding how materials behave in production is key to mastering your workflow. Watch the demo below to see Substance Material Kits in action, then explore the library to experiment, customize, and learn from professional-grade procedural setups.
Meet the Artist
 Aleksei Druzhkov (Alexey HRDesign) is the Lead Technical Material Artist at KitBash3D and the author of the BAM Automat add-on for Blender and MARS (Marmoset Adaptive Render Scenarios) for Marmoset Toolbag, as well as tools for Substance 3D. He specializes in procedural PBR materials and production pipelines; his tools and materials have been used in KitBash3D kits that have appeared in Hollywood films, television series, and music videos. His work has been published in 3D World magazine, highlighted on Adobe’s website (Insanity Awards), featured in Adobe’s “15 Years of Substance” anniversary video, he has served as a judge for an 80 Level contest, and he took second place in the NVIDIA Omniverse Marvelous Machines contest. Aleksei is passionate about advancing the industry: he builds scalable pipelines, shares knowledge, and helps artists and studios create high-quality environments faster.