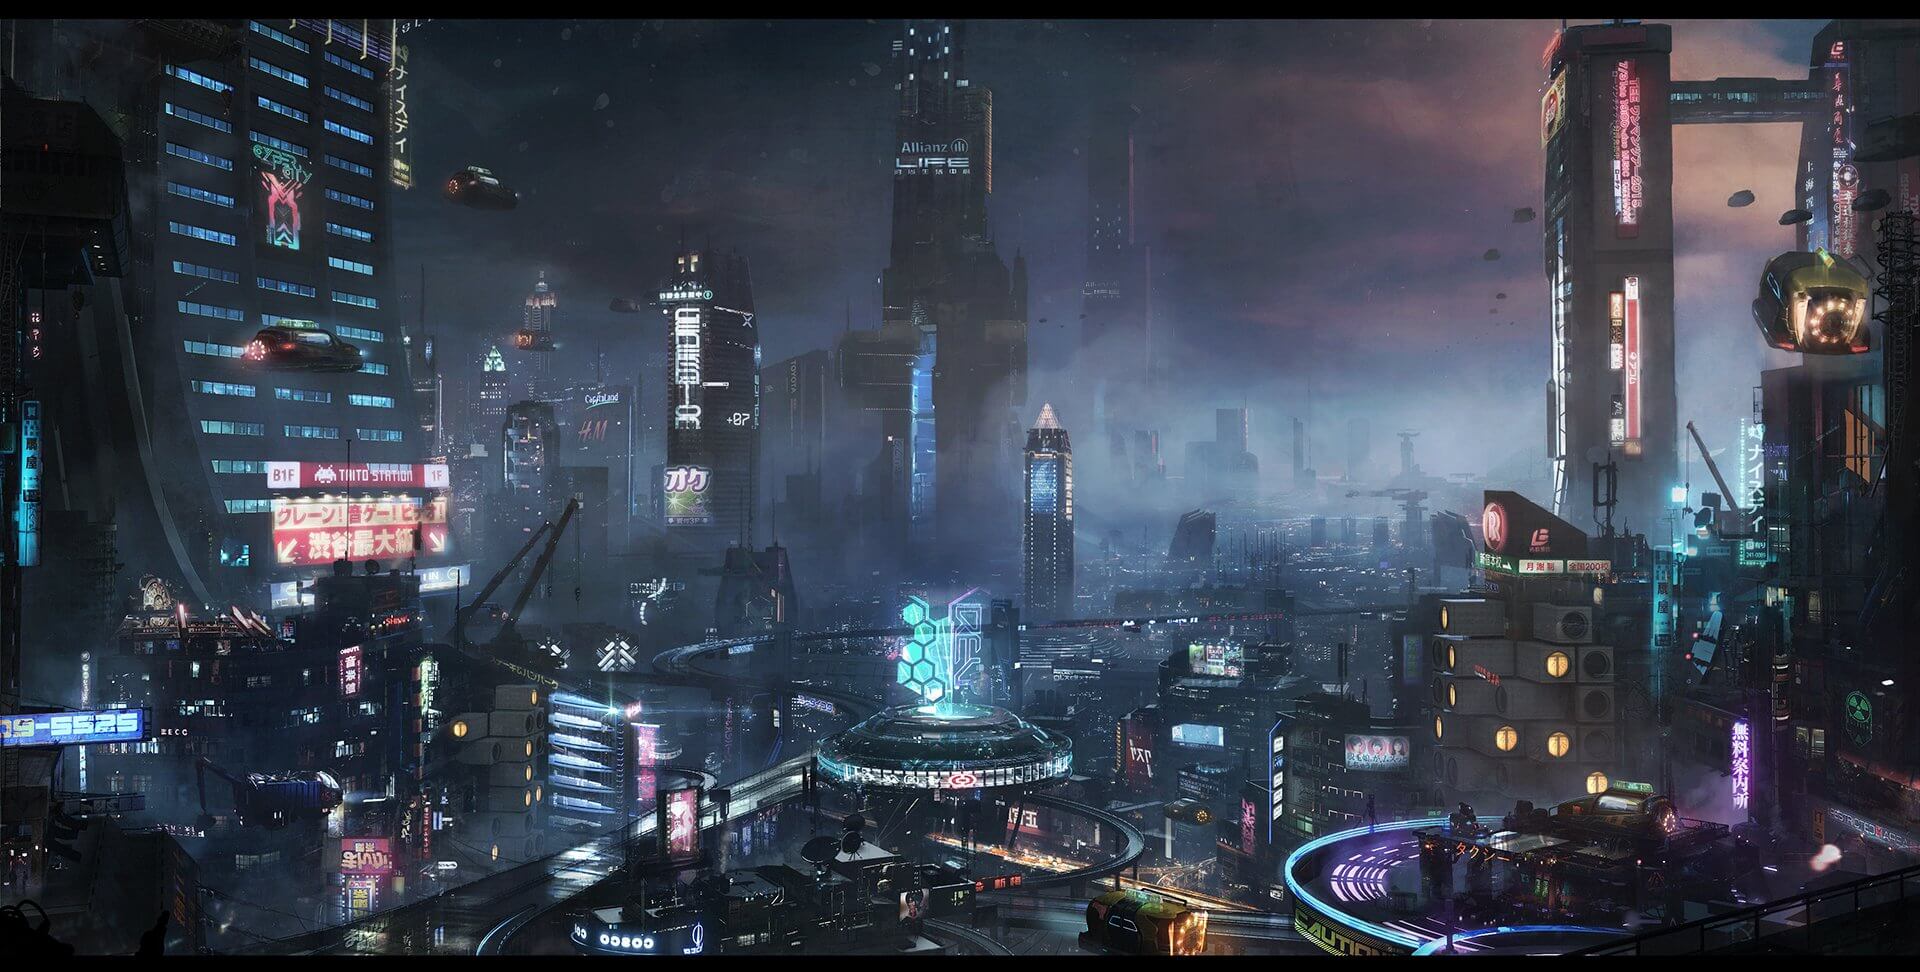
Cyberpunk city from Toni Pykäläniemi on Vimeo.
What inspired you to create this piece?
I’ve always been a big sci-fi fan and movies like Blade Runner, Akira, and Ghost in the Shell had a profound impact on me when I first saw them. Ever since I’ve been dreaming of spaceships, distant alien worlds and the future of mankind. When my friend mentioned to me that he’s participating in a cyberpunk contest I immediately saw an opportunity to create something where I could explore these themes again.
The contest gives structure to the process by providing clear targets and deadlines. For the inspiration I looked back to Blade Runner and Fifth Element, which gave me the idea to portray a cavernous megacity that would almost be like a city within a city -- so big that hover car traffic would create floating highways inside the massive megastructure. I even came up with a small story that would help me guide the design decisions throughout the process.
Can you take us through your process?
I started by blocking out the camera move and the framing of the shot in Maya. At this point, I still had my hero car in play, which was part of the small story. I did remove this later on as I wanted to give the city more of the focus.
My simple blocking geo straight out of Maya.

Asset phase
I tagged my assets in Modo with material tags which Clarisse would be able to read. Once I loaded these assets into Clarisse I was able to assign materials based on these tags. Some of my building components didn’t have UVs so I went ahead and used cubic projections with Megascan materials that provided me a good starting point to judge which parts held up and which didn’t. For the Cyberpunk Mini Kit, I swapped out the windows on all the buildings with nighttime office windows textures as I knew this would be a nighttime scene and I wanted to show the scale using scattered lights and lit windows.

I used two different night time window textures and varied those across all window surfaces.
Look development
Now that I had my assets in Clarisse it was time to do some look development. I used various HDRI domes to light up my scene and tweaked the materials a little bit further in Clarisse where I would render my animation. Megascans came in handy in order to add more complexity to my material selection. I built some of my materials around a template that would randomize the materials across certain surface types which I had tagged earlier.

I built random switch nodes on some of the materials that would vary the materials across the scene.
Scene assembly
I started the scene assembly by scattering my buildings and other assets in Clarisse on top of my layout geo, which I had done earlier in Maya. Once I was happy with this I went in and did custom set dressing to compliment the scattered buildings and give the scene multiple levels of depth to enhance the scale. After I dressed up the bare portions of the set with various scaffolding and pipes. I knew that I needed some smokes and steam plumes so I jumped to Houdini to sim a couple of generic VDB steams which I scattered in the scene where it made sense.

I wanted to use scattering for my additional city lights while keeping them from being completely random. I found that scattering on primitive centers gave me the organized while random distribution.
Lighting the scene
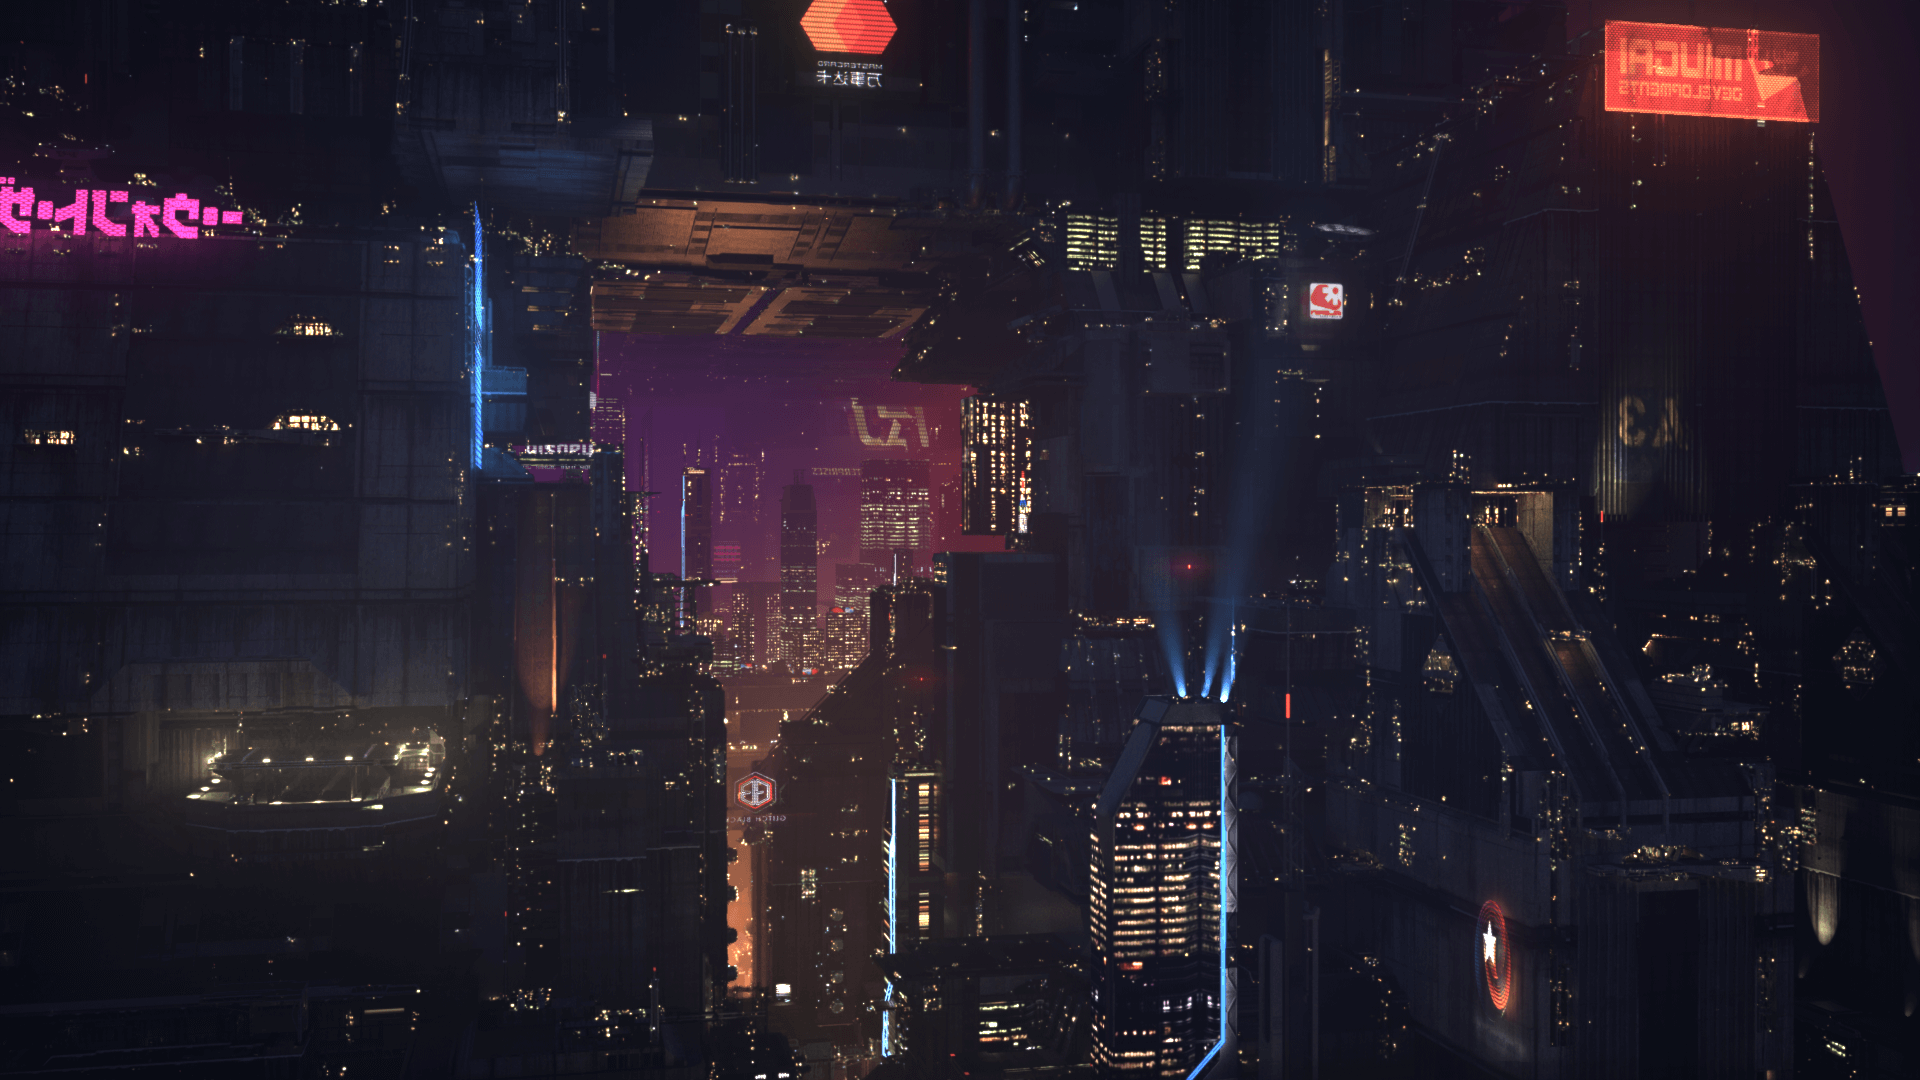
At this point, I had locked down my cyberpunk color palette and knew my key light direction from my initial look dev tests so it was time to scatter tiny practical lights that you see all over the scene and add spotlights and various other smaller light sources. The big part of the general mood came from my billboard holo ads that I had prepped earlier using different packs of decals and motion graphic loops that I turned into light sources. Throughout the lighting process, I wanted to keep the scene colorful by featuring purples and pinks, as they were an integral part of my cyberpunk palette.
Raw light render:

Scattered lights pass:

Holo ads:

Adding life to the scene
Although I still had my animated vehicle to drive the viewer's attention and to motivate the camera move I felt that I needed more life in the city. I prepared a bunch of generic car models to which I added some lights and details and used Clarisse’s scattering system to populate my hovercar highways. With a couple of simple expressions, I had multi-lane highways with moving hover vehicles ready to be placed in the scene.
The traffic set-up in Clarisse:

Compositing stage
I rendered my scene in multiple passes with a good selection of AOVs to facilitate the composting process. Here I made final creative decisions on balancing the lighting and the colors. I added more depth hazing with vivid colors contaminating the atmos from off-screen holo ads and the traffic far below at the lower levels of the city. As my goal was realism I wanted to mimic real-life lens effects such as chromatic aberration, lens distortion and light blooming as close as possible. Final step was to add film grain and 2.35 widescreen matte to finish off the cinematic feel.
All elements comped together in Nuke:


Color grading
There was still one more step to go before getting to the finishing line. Here I took my comp into Adobe Premier and tested with some creative grading choices and landed with the filmic grade that you see in the final animation.

How long have you been an artist? What is your “origin story”?
I’ve been doodling as long as I can remember. From a very early age I was drawn to sci-fi and fantasy and watched the reruns of the original Battlestar Galactica and Star Trek. In my teens I became fascinated with video games and computer graphics, because the new medium seemed to be pushing the envelope further than other mediums. I kept on drawing more or less through my school years and fast forward 10 years, and I ended up in a Fine Arts program, during which I quickly switched to film studies which was supposed to become my career. But as with all good plans, things don’t always go as envisioned, so almost accidentally I ended up working in visual effects as an environment generalist. It was a career path that I had never really thought about, but I found it very exciting to work on cool projects with cutting edge tools. This provided me a great way of working in collaboration with great artists over the years while honing my own skills on the side. Over the past years, I’ve been doing more and more concept art and 3d sculpting which I enjoy greatly. My day job currently is a Visual Effects Supervisor at DNEG in Vancouver.
And finally, what does art mean to you in both a personal and larger societal context?
I’ve always felt that artists and creatives alike are visionaries; like a modern-day shaman dreaming of hidden facets of existence which they are able to manifest with the selected medium to be shared with one another. This in return expands our collective consciousness by providing new angles to our very existence and in the end, tells us more about what we are. Underlying everything, I feel it’s these basic big questions that motivate us to explore unseen worlds.

Toni is currently a VFX Supervisor at DNEG in Vancouver and recently placed 2nd in the In-Motion category of our latest Cyberpunk kit #KB3Dcontest. He has a wide variety of mediums that he likes to work with, ranging from digital illustrations to visual effects for films.
VIMEO: https://vimeo.com/360197998
ARTSTATION: https://www.artstation.com/pykalaniemi